
Description
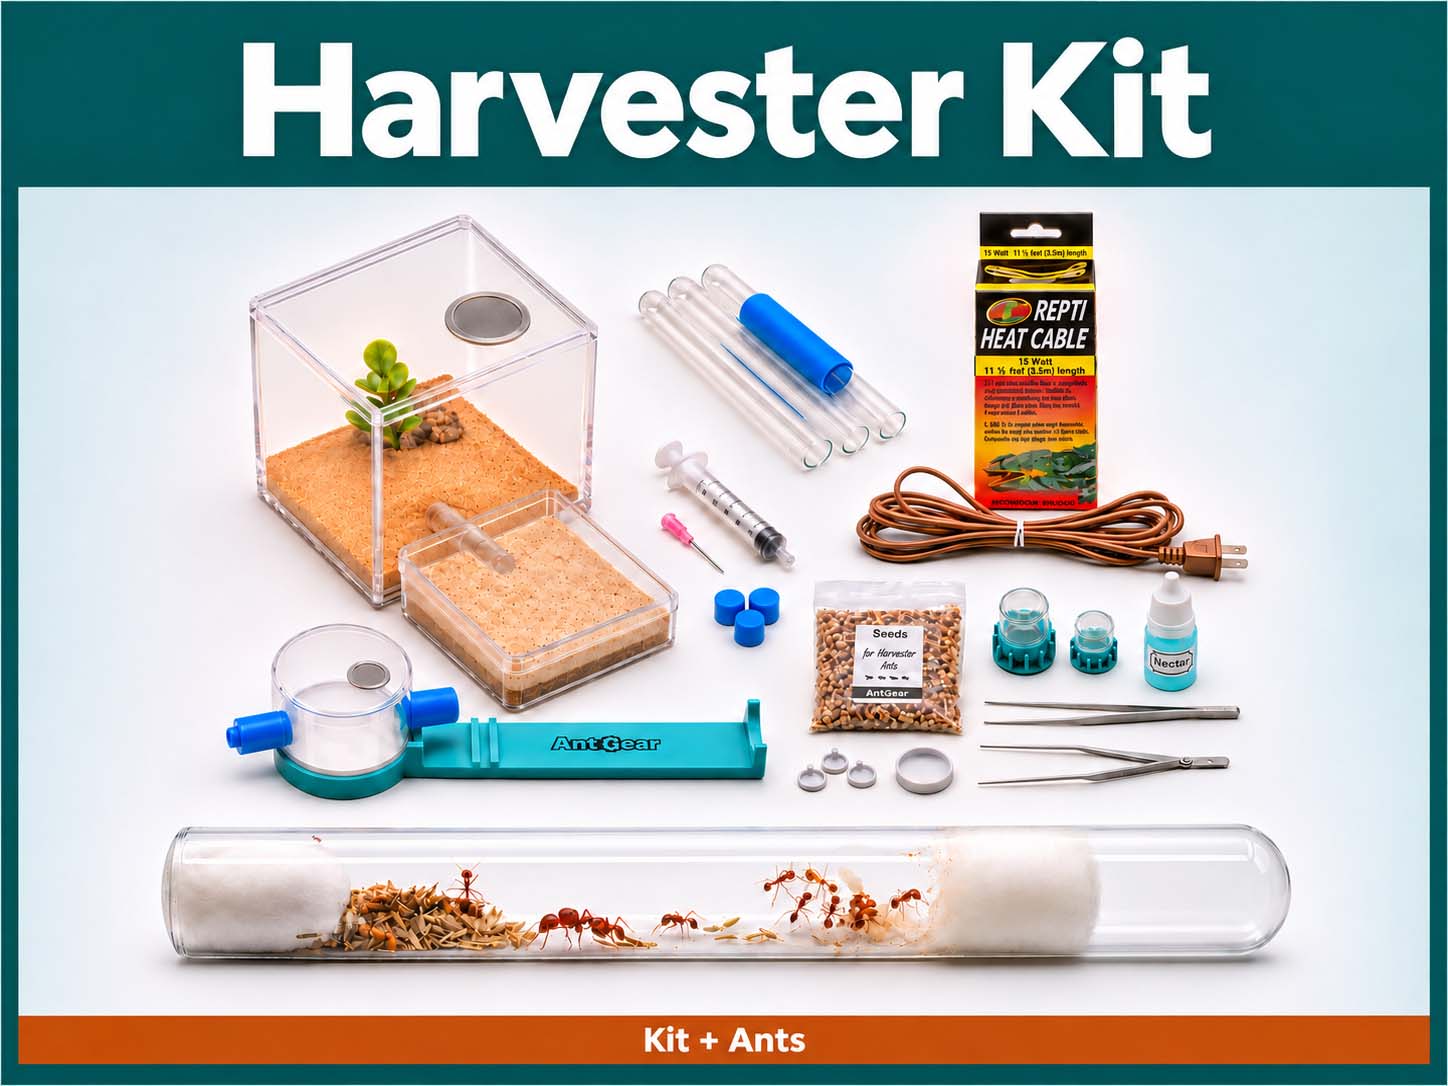
This harvester ant starter kit has everything you need to house, heat and feed your first colony, in one box. You only need to add exam gloves and a heat control (see below). It’s designed to last up to about a year.
Beginner-friendly. Harvester ants are hardy, active and fun to watch. They can sting, so don’t handle them directly. Use the forceps in the kit, and see the safety section below.
Two ways to order
- Include Ants: the kit plus a live colony. This is the easiest way to get started.
- Kit Only: just the kit, if you already have a colony.
The ants
With Include Ants, a live Pogonomyrmex occidentalis (Western harvester ant) colony with a queen is added to your order. The number of workers depends on the time of year: usually about 5 in summer, 7 to 10 in fall, 10 to 20 in winter and over 20 in spring.
The kit
The kit is the same whichever option you choose. It holds the home, the heat, the food and the tools, so there’s nothing to hunt down later. The seeds are measured for a starting colony of Western harvester ants: about 6 months for 5 workers, or about 4 months for a spring colony.
An outworld is the ants’ feeding and exploring area, attached to their nest. They leave the nest to find food and water there, then head back inside.
What’s in the box
- Housing: Mini Roundhouse outworld with 3D printed heat cable base · Ant Den (nest + outworld) · blue sponges for the test tube setup
- Test tubes: 3 extra test tubes for when the water runs out in the first one · test tube privacy screen
- Feeding: 1ml liquid feeder (Mini Roundhouse) · 5ml liquid feeder (Ant Den) · feeding bowls · seed mix · a small amount of ant nectar
- Heat: Zoo Med heating cable
- Tools: entomology forceps for handling ants · tweezers for feeding insects · blunt-tipped syringe for adding water to the Ant Den
What’s not in the box
- Exam gloves. You’ll want these for changing the liquid feeders (see the safety section).
- Heat control. A reptile thermostat, rheostat, or an incandescent dimmer switch set to medium, to control the heating cable.
- Insects. The tweezers are for feeding insects you buy yourself, if you choose to offer them.
How the kit grows with your colony
Stage 1: Test tube and Mini Roundhouse (the first months)
Your colony starts in a test tube setup (made with the blue sponges) attached to the Mini Roundhouse, a small round outworld. The Mini Roundhouse sits on a 3D printed base with a slot for the heat cable. Use the 1ml liquid feeder here.
Stage 2: Ant Den (about 35 workers)
Once your colony has about 35 workers, move them into the Ant Den, a nest and outworld in one. Spring colonies arrive with over 20 workers, so they may get there sooner. Start using the larger 5ml liquid feeder. Ant Den instruction manual (PDF)
Stage 3: Something bigger (about 8 to 12 months)
After 8 to 12 months, the colony may be ready for more room. AntQuarters is a good next step.
Feeding
Harvester ants live mostly on seeds, and the kit includes enough to feed a colony of 5 workers for about 6 months, or a spring colony for about 4 months. You can offer insects now and then. A good rule of thumb is to keep them to about 30% of the diet or less. Use the tweezers for feeding insects.
The ant nectar is an occasional treat. Harvester ants don’t need it to stay healthy, but they can enjoy it once in a while.
Care steps
Using the heating cable
In the first stage, slide the Zoo Med heating cable into the slot on the Mini Roundhouse base. Warm only the end without the water, so the ants can always move to a cooler spot. Once your colony moves into the Ant Den, place the cable over the Ant Den nest, close to the vinyl tube the ants crawl through to get from the outworld to the nest.
If you use a reptile thermostat, set it to 85 to 90°F. With a rheostat or dimmer switch, set it to medium.
Moving to a fresh test tube
When the water runs out in the first test tube, make a new one from the kit. Watch our short video to see how it’s done. It shows the setup made with cotton and with the blue sponges from this kit.
Then plug the newly made tube into the other end of the Mini Roundhouse. Remove the stopping plug from that end first.
Adding water to the Ant Den
Use the blunt-tipped syringe to add water to the Ant Den. Start with a small amount and top up as needed.
Safety: harvester ants sting
Harvester ants can sting, and the sting is painful. Do not handle them directly. Use the forceps from the kit if you need to move an ant.
Wear exam gloves (latex, or nitrile if you have a latex allergy) any time you change a liquid feeder. Gloves add a layer of protection against stings while your hands are close to the ants. Gloves are not included.
FAQ
Does this kit come with ants?
It does when you choose Include Ants: a live Western harvester ant colony with a queen. Choose Kit Only if you already have a colony.
How long does the kit last?
It’s designed to last up to about a year: the first months in the test tube and Mini Roundhouse, then the Ant Den. After 8 to 12 months your colony may be ready for a larger nest like the AntQuarters.
When do I move the ants into the Ant Den?
When the colony has about 35 workers.
How much seed is included?
Enough to feed a colony of 5 workers for about 6 months, or a spring colony (over 20 workers) for about 4 months. A larger colony will use it faster.
Do harvester ants need the ant nectar?
No. It’s an occasional treat they can enjoy, not a requirement.
Can the ants sting me?
Yes. Don’t handle them directly, and wear exam gloves when changing the liquid feeders. See the safety section above.
Where does the heating cable go?
At first, in the slot on the Mini Roundhouse base. After the move to the Ant Den, over the nest, close to the vinyl tube the ants use to travel from the outworld to the nest. Temperature settings are in “Using the heating cable” above.
What are the 3 extra test tubes for?
They’re replacements for when the water runs out in the first test tube. Make a new tube, remove the stopping plug from the other end of the Mini Roundhouse, and plug the new tube in there.
What else do I need to buy?
Exam gloves for changing the liquid feeders, and a reptile thermostat, rheostat, or incandescent dimmer switch set to medium to control the heating cable. Insects are optional.
Miranda Jefferson (verified owner) –
Great value for a starter setup for small colonies! Love the included syringe and how easy it is to hydrate the nest. I dumped my ants into the outworld and they moved into the nest in a couple of hours, they seem cozy!
Upvote if this was helpful (1) Downvote if this was not helpful (0) Watch Unwatch Flag for removal